Building temperature and humidity sensors for OpenHab
Since the OpenHab instance that is running in my network has been quite empty for a long time I decided to give some home made temperature and humidity sensors a shot. The goal was to have sensors that …
- … send data wireless
- … do not require additional services (e.g. an mqtt broker or similar)
- … are cheap
- … are small enough to be casually placed in the rooms they operate in
Bonus points for beeing able to run them on batteries.

Collecting temperature and humidity values
First of all I needed some way to measure temperature and get it somehow to my OpenHab instance. But with what hardware? A raspberry pi seems to be a bit overqualified and energy hungry for just stupidly measuring temperature and sending it somewere else.
I have little experience with microcontrollers but I like to browse through the hackaday.com for fun. In some projects people used ESP8266 boards for their projects. Those sounded very interesting, because they are small, cheap and can connect to wifi networks. That sounded pretty awesome so I wanted to try those.
I can’t remember where I heard about the BME280 sensor but those can measure temperature, humidity and pressure and work well with the ESP8266 boards. You can also find a lot of other blogs that use them and explain how they can be used. I don’t use the pressure part right now, but who knows …
ESP8266 / BME280
I ordered several a ESP8266 NodeMCU boards and the BME280 breakout boards. I used those (Amazon links):
I made the mistake when soldering together the first pair. And it’s really annoying to unsolder them again. Especially if you don’t realize that it is soldered wrong at first. So here is a tip if you are just getting started with microcontrollers and such: Use a breadboard first! It lets you try out the correct pins and connections before soldering. You can make sure you connected everything correctly before proceeding. It’s much faster than soldering and thus much better for trying things in different ways.
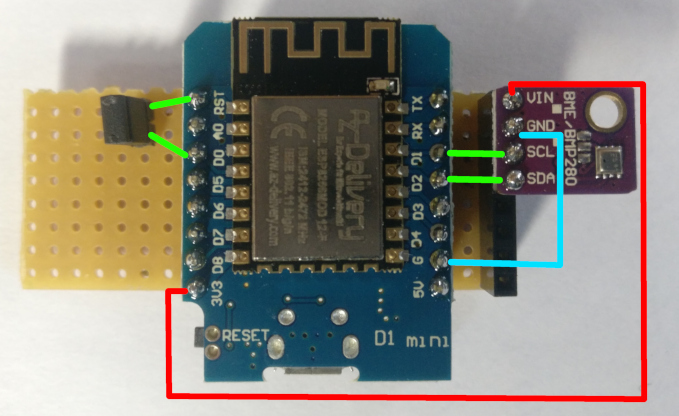
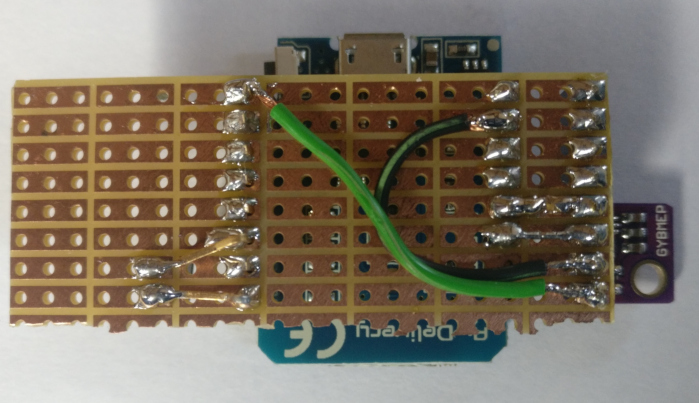
For programming the board I used the ArduinoIDE. I also used a lot of info from this blog post here on how to connect the BME280 to the ESP8266 board and how to install the necessary extensions in the ArduinoIDE.
What’s different on my build is, the ESP8266 does not host a web service over which the sensor values can be quieried. This would require the sensor to be always on. I didn’t want to do this because I wanted to save as much energy as possible to be able to run the sensors on batteries later.
Because I don’t have a 3D printer, I put the sensors in empty match boxes (big ones). There is also enough space for batteries in there.
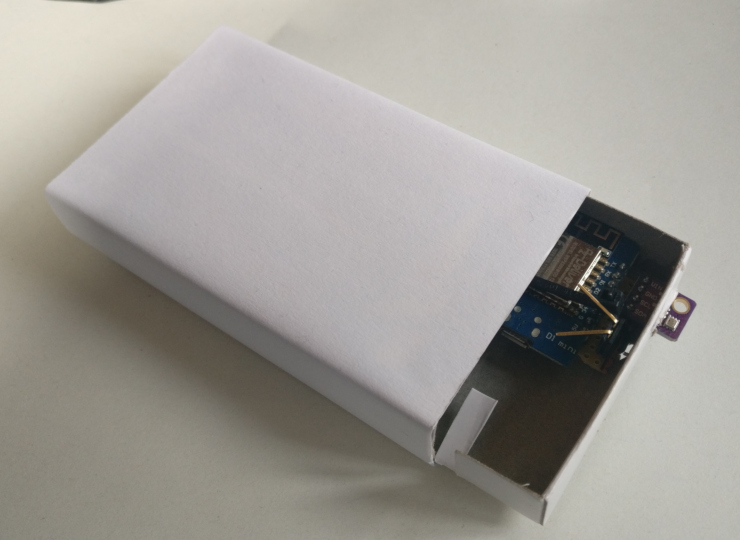
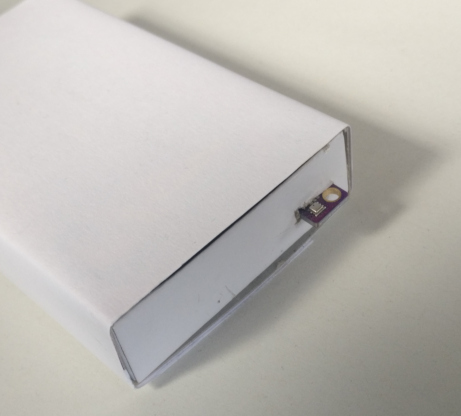
Sending via WiFi
Because the sensors can not be queried they should send their collected data to the OpenHab service somehow. I tried to avoid an additional service such as an MQTT broker because it seemed a little oversized for my five sensors - at least for the moment.
OpenHab has a REST interface that let’s you manipulate the item states via HTTP requests. So this is a very easy way to update the soon to be created temperature and humidity items. No need for any other component. How a request has to look like can be seen in the OpenHab documentation. More on that later.
Did you read that blog post I mentioned above? Good! Then you see that connecting to a Wifi network is aktually pretty easy.
Energy saving
One of the goals was to place those sensors somewhere in the room where they don’t get in the way. This is easily accomplished when they are run on batteries. But for this we need to write the software in another way. As mentioned above, running a web server on the ESP8266 and querying it is possible, but costs a lot of energy. Most of it while nothing is measured and the values are not queried, but the webserver just waits for requests.
With my sensors I took another approach.
Deep sleep
When trying to save energy the deep sleep mode is often mentioned for the ESP8266. This mode disables most of the boards features except for the RTC (i guess that
means Real Time Clock), which can in turn be used to wake up again from deep sleep. The energy consumption of the RTC is much lower than with the
other features (e.g. Wifi, System clock, CPU don’t know what else). The difference in programming is, that you never enter the typical loop method in your
program. The loop is done by going to sleep after the setup function is run. When waking up after the specified amount of time the setup function starts from the beginning.
void setup() {
    // This method is run at program start.
    // Program starts e.g. after you press the reset button
    // or the ESP8266 wakes up from deep sleep.

    // go to sleep for 30 seconds (or 30.000.000µs)
    ESP.deepSleep(30 * 1000000);

    // code after the deepSleep method call is never reached
}

void loop() {
    // code in the loop method will never execute
    // if the deepSleep method is called in the
    // setup method.
}
An important thing to note is, that the ESP8266 won’t wake up after the specified time if the RST pin is not connected to the D0 pin. So make sure you do that
so the program works. I had an issue with uploading my sketch to the ESP when this connection was already made while uploading. So I soldered this to jumper pins
so I can remove the connection while programming.
A lot more detailed information about deep sleep can be found in this blog post.
Wifi reconnect
Going to deep sleep and waking up again requires a reconnect to the Wifi in each iteration. This takes quite a while because a network scan is performed to find the appropriate channel on which the wifi is sending. Also getting an IP address via DHCP takes really long. The latter duration can be dramatically reduced by using a fixed IP address. But I don’t want to specify a fixed IP for all sensors in the firmware because this is so unflexible.
The problem with scanning for the channel can also be mitigated by remembering the channel when sucessfully connecting for the first time. This blog post is an excellent resource on how to do that.
DHCP cache
The problem with the DHCP still remains. So I extended the solution of the wifi channel and bssid saving and added the IP address, netmask and gateway after retrieving a DHCP lease for the first time. Note that this is not really a valid DHCP client implementation because it does not take the actual lease time into account. But it works fine and reduces the total time for one cycle of waking up, measuring, connecting to wifi and sending the data from about 16 seconds down to 4. That should save some energy.
struct {
  uint32_t crc32;
  uint8_t channel;
  uint8_t bssid[6];
  uint8_t padding; // everything to here is from the original blog post
  uint32_t ip;    // ip, netmask and gateway were added by me
  uint32_t netmask;
  uint32_t gateway;
} rtcData;
Savings
All those things are done to reduce the energy consumption. But I can’t really prove that it is really saving much. I don’t have the equipment nor the ability to measure how long my batteries will last - but a reduction from 16 to 4 seconds shouldn’t be too bad.
OpenHab items
Because I want to use the same firmware for all sensors without modifying it. I need some identifier for the sensor when it sends the data to OpenHab. For this identifier I
chose the MAC address. The items for the sensors values in OpenHab are following the naming conventiones I adopted from the OpenHab documentation. So they can be
easily identified throughout the system. What that means is, that they do not include a MAC address in their name. They are named
something like GF_LivingRoom_Temperature.
So how can I update those items without adapting the firmware of each sensor?
Mapping MAC addresses to acutal items
The answer is, there must be some kind of mapping. I need to map the MAC address of the sensor to an actual item in OpenHab. The idea is to have an OpenHab item that corresponds to the MAC address of the sensor. This helper-item is then used to update the specific temperature or humidity item.
First thing I did was to create a group that contains all items that are only used to map values to another item. Why this is necessary you will see later. Then I created an item that has the MAC address in its name so it can be updated by the sensor over the OpenHab REST interface. In the items label I set the name of another OpenHab item - the one that should actually hold the value. So this establishes the mapping between MAC address and item that should be updated in OpneHab.
See the sample OpenHab items configuration file below.
// group that contains mapping items
gSensorMapping

// create item that maps the MAC address to the actual item.
// Note that this item has the gSensorMapping group assigned
Number  temperatureAABBCC112233	"GF_LivingRoom_Temperature"    (gSensorMapping)

// create the actual temperature item that should be used for everything within OpenHab
Number	GF_LivingRoom_Temperature	"Temperature [%.1f °C]"	<temperature>	(GF_LivingRoom)
After that, the mapping item (the first one) can be easily updated by the sensor using the REST interface and the sensors MAC address. This works without modifying the firmware for each sensor. The MAC address is just included in the REST url as the name of the item so the requested url looks something like this:
https://openhabserver.baseaddress.com/rest/items/temperature + MAC_ADDRESS
This updates the mapping item, but not the acutal temperature item we want to use. To achieve this I wrote a small OpenHab rule that uses the mapping information to transfer the sent values. Here the group that was created earlier is used.
The rule listens on updates of mapping items - the ones that are part of the gSensorMapping group - and forwards the value to
the item that is referenced in the label of the mapping item.
rule "Forward updates of raw sensors to the appropriate high level sensor"
when
	Member of gSensorMapping received update
then
	logInfo("Map Sensor", "Mapping sensor '" + triggeringItem.name + "' to '" + trig
geringItem.label + "'")
	var targetItemName = triggeringItem.label
	postUpdate(targetItemName, triggeringItem.state.toString)
end
The good thing is, that the rule is only necessary once. More mappings can easily be defined by adding a mapping item and a regular item that is used in OpenHab as usual.
Check sensors sending data
I plan to run the sensors on battery, but they don’t report their battery charge condition (yet). To make sure they are running I let openhab check if the sensors send data in regular intervals. If they don’t, I send a warning notification to check on the affected sensor.

Similar to the sensor mapping, for this I created a new group that will be applied to all items that expect regular updates. Then a rule is created that checks if those items were updated in time. In my case I only check this during the day to avoid notifications in the middle of the night. Also my notifications are sent via telegram but other channels would be possible depending on your OpenHab configuration.
Group gWatchdogWarning24h

// Assign the above group to all items that should be checked for regular updates
// in my case e.g. the temperature and humidity items
Number	GF_LivingRoom_Temperature	"Temperature [%.1f °C]"	<temperature>	(gWatchdogWarning24h, persist_on_update, GF_LivingRoom)
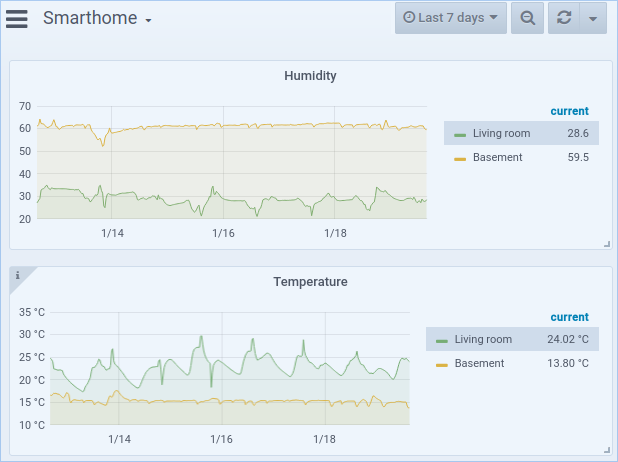
The temperature item has the gWatchdogWarning24h assigned so it will be checked by the following rule. The persist_on_update group is used persist the items values in an influx database. It is necessary to persist the items values in some datastore, otherwise the check for the last update is not possible. Additional advantage is, that you can create nice graphs via grafana.
The rule that checks the updates:
rule "Send warning if item has not been updated in the last 24h"
when
	Time cron "0 0 8-20/5 1/1 * ? *"
then
	logInfo("watchdogRules", "Checking items that require status updates every 24h")
	var itemsThatNeedUpdates = ""

	gWatchdogWarning24h?.allMembers.forEach [ item |
		logInfo("watchdogRules", "Checking item: " + item.name)

		var rawLastUpdate = item.lastUpdate
		if (rawLastUpdate !== null)
		{
			var lastUpdate = rawLastUpdate.toInstant().toDateTime()
			if (lastUpdate.plusHours(24).isBefore(now))
			{
				itemsThatNeedUpdates += item.name + ", "
			}
		}
		else {
			logInfo("watchdogRules", "Does not seem to have received an update ever")
			itemsThatNeedUpdates += item.name + ", "
		}
	]

	if (itemsThatNeedUpdates == "")	{
		logInfo("watchdogRules", "All items seem to be up to date")
	}
	else {
		logInfo("watchdogRules", "The following items did not send an update in time: " + itemsThatNeedUpdates)
		sendTelegram("openhab_bot_name", "The following items did not send an update within 24 hours. Check batteries? " + itemsThatNeedUpdates)
	}
end
Conclusion
The self made sensors work quite well and the grafs look quite nicely. I don’t now how long the batteries will last but I did my best to reduce the energy consumption. This was my first step toward a smarter home.
The source code for the sensors can be found in my github repository in case you are interested.